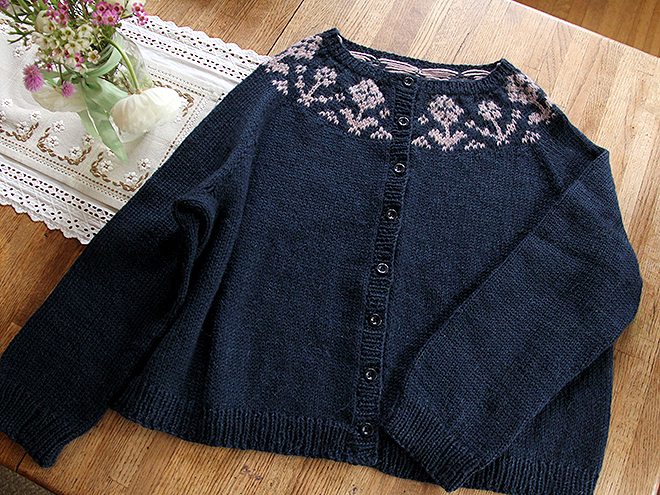
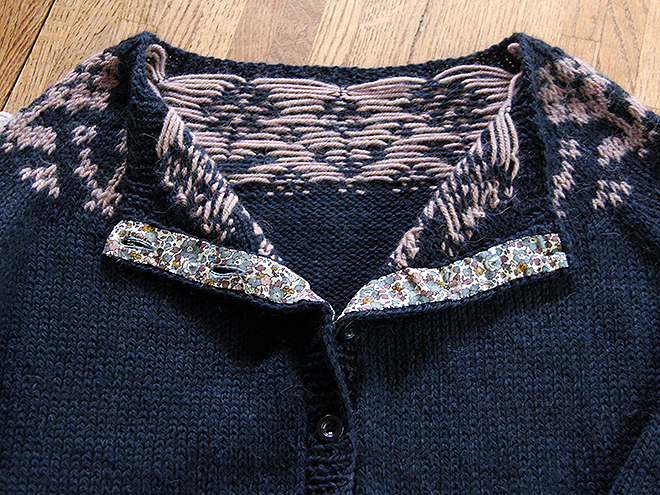
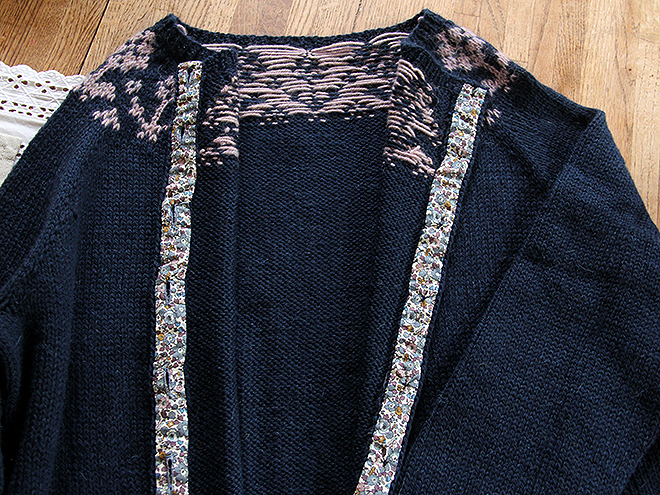
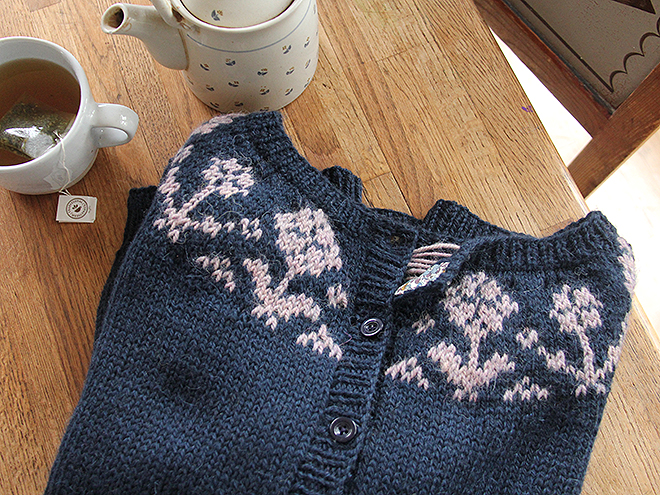
I finished my Ellen-ish version of a Ryðrauð-kind-of-yoke sweater and I wanted to show it to you before I get on to other things and forget to do it. Lately I feel like I'm getting behind in certain things and then they just disappear from my brain somehow. But I finished my navy-blue sweater yesterday and I am so pleased with it that I decided to have a nice time this morning taking its picture on the dining room table.
As I mentioned a couple of weeks ago, I used the Ellen Cardigan pattern in size XL and made no modifications to any of the math used in the pattern. My original version of that sweater (I finally put some stuff on Ravelry, and my Ellen is here, for what it's worth) fits me perfectly (for once). I was so excited about it that I cast on for this navy sweater almost immediately after I finished Original Ellen, and decided to use a modified/simplified version of the Ryðrauð yoke and pretty much plug it into the stitch counts for the Ellen yoke. The construction of the original Ryðrauð is bottom-up and completely different than my navy sweater, which is top down. But I think my flower pattern definitely gives a nod to the original Ryðrauð and that makes me happy. I still think the original Ryðrauð is really gorgeous and maybe I will make that actual pattern someday, I don't know. The chart I used is on this post and I think anyone could modify the number of repeats to use with the Ellen (which is a free pattern) yoke in any size if you wanted to.
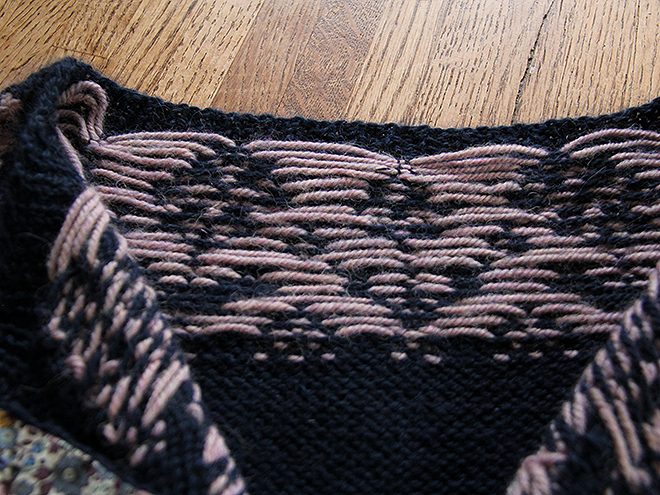
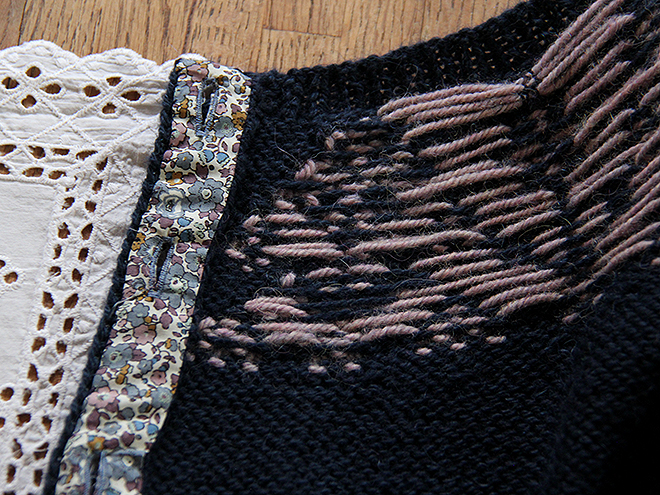
Anyway, a few things about it: The floats were huuuuuuuuuuge between the first three rows of colorwork. Thank you to those of you who suggested different links so that I could look at potential solutions to that. In the end I sort of jerryrigged it (mostly because I had already knit it but also because the solutions seemed kind of complicated!) and literally just used a bit of embroidery floss to tack down the longest floats in the center. I didn't actually sew through the yarn there, but I sort of wove the floss over and under the strands, keeping them together but still letting them move. That said, I don't even know how much they needed to move. I probably could've tacked them all the way down. Either way, it seems to have worked just fine and it was super easy!
Also, I did cast on and knit the neckband before doing the colorwork, and then when I knit the button bands on I just picked up the neckband stitches, too. For some reason I got a lot fewer stitches on my buttonbands than last time and I had to kind of recalculate the buttonhole placement, which I did but I still kind of messed up by couple of stitches at the end. But the buttons at the top look good and the placement is better for me than on the original Ellen.
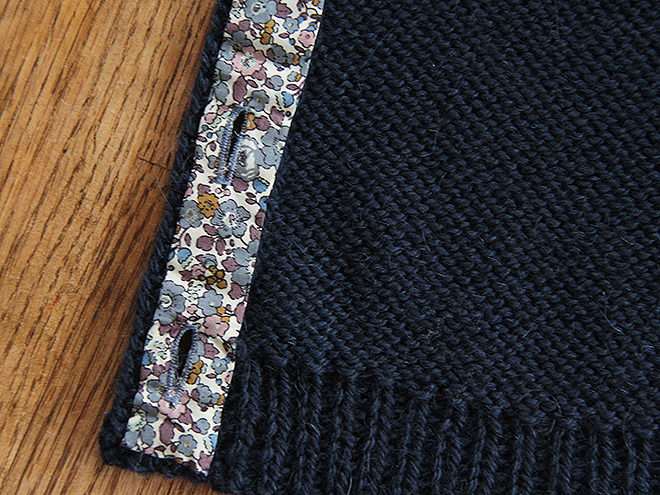
What I really wanted to tell you, though, was how I lined the button bands. I really, really like this treatment of button bands because it adds some stability to your bands and knitted buttonholes and prevents the knitted button bands for stretching out and gaping when buttoned — I really do not like it when the button bands gape on a sweater. And also, the button bands are just so pretty and nice and kind of like a little secret luxury. No one really sees them while you're wearing the sweater but for some reason just having them on my very own sweater feels so luxurious and special and sweet.
I got some questions about this the last time I did it on a sweater for Mimi so I thought I'd elaborate on how I did it here: After the sweater was blocked, I laid it out on the table and lined up the knitted BB's (button bands) and measured how long and how wide each of them was. In my case, they were 21 1/2" long by 1 1/8" wide. Adding a 1/4" hem on each edge meant I cut two pieces of fabric that were 22" by 1 5/8". I cut these on the straight grain (instead of using bias tape, which you could also do) so that they wouldn't stretch. (You could also use a ribbon for this but I can never find exactly the ribbon I want when I need it.) I carefully pressed under 1/4" along all edges. Then I laid one of the pressed strips face down on the table and then laid the BB of the sweater right side up, directly over it. You'll want to take some time to make sure that both sweater and strip are carefully placed here; you could pin them together if you want to, but I didn't. I used a water-erase fabric marker to mark where each knitted buttonhole fell on the fabric strip, and then marked that through to the right side of the fabric. Then (after some testing on scraps of the same fabric) I used the automatic buttonhole feature on my sewing machine to stitch all of the buttonholes vertically on the fabric strip. (This feature is totally awesome. You put the button that you want to use in the back of the special foot, pick the correct setting, and press "play." If your machine doesn't do this, stop in a machine shop sometime and ask them for a demonstration of this feature; it's pretty life-changing if you like to sew clothes.) I opened all the buttonholes as you usually would, with a seam ripper, and then just whipstitched, by hand, each fabric strip to each knitted button band using thread the color of the sweater. Typically, if you use a ribbon you usually don't stitch down the inside edge. But with fabric you have a folded/hemmed edge instead of a finished edge and so I sewed it down.
I should also mention that my linings here are a bit different than the way you would do them if you've steeked your sweater. (This sweater was knit back and forth, not steeked.) Usually the lining ribbons on steeked sweaters are used to cover the cut edge of the steek itself, and I've always seen the ribbon falling just shy of the buttonhole. But I suppose you could make the lining or ribbon wider and do buttonholes in that, too, as I've done here. It's a bit of a laborious process but after all of that knitting, it's really nothing, and such a nice way to finish a sweater. If you've done this, or if you have any suggestions of questions, let me know. I'd love to hear them.
Mimi and I went to the fabric store yesterday and she helped me pick out the buttons so I sewed those on when I was done with the bands. I'm wearing the sweater as I write and couldn't be happier with it.